Custom domain configuration
By default, your products are assigned to the .earlybird.rocks or .newpage.im subdomain you chose while onboarding. However, you can add a custom domain name to your website. We highly recommend using Cloudflare as your DNS provider for added security and flexibility. The following instructions will guide you through adding a custom domain to your landing page.
Adding a Domain
If you do not currently possess a domain, you can purchase one at domain registrar companies such as GoDaddy, Google Domains, and Namecheap. After purchasing a domain, proceed with the following steps:
Step 1: Select your product
On the dashboard, select the product to which you want to assign your domain.
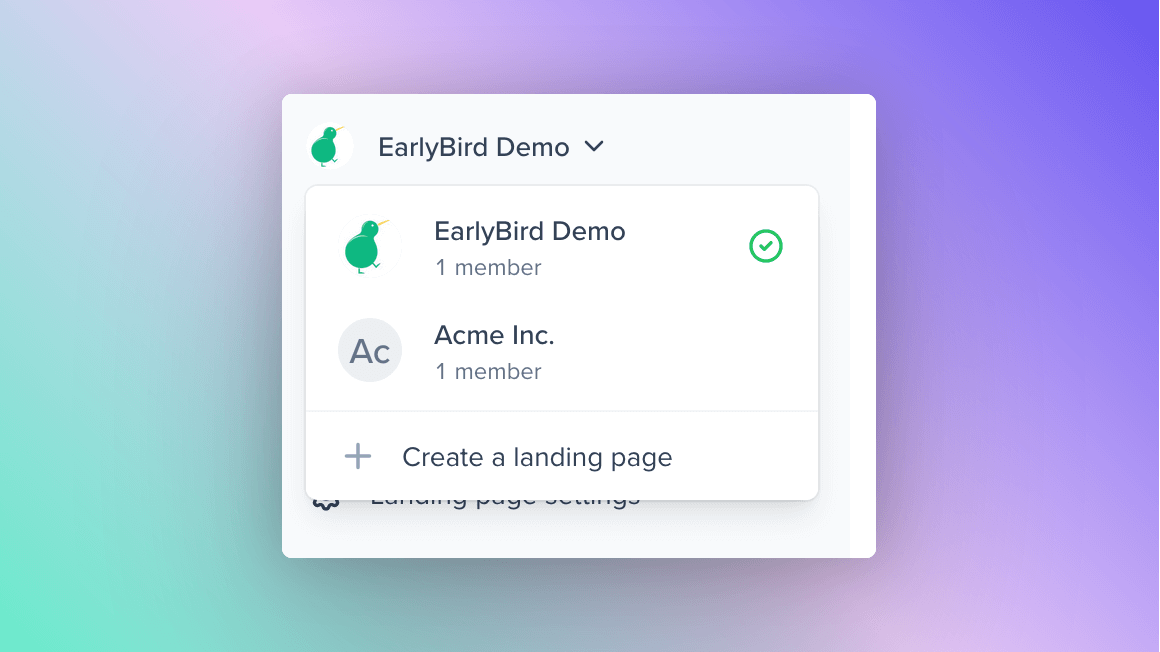
Step 2: Go to the Landing page settings
Once you have selected the product, go to the Landing page settings from the sidebar.
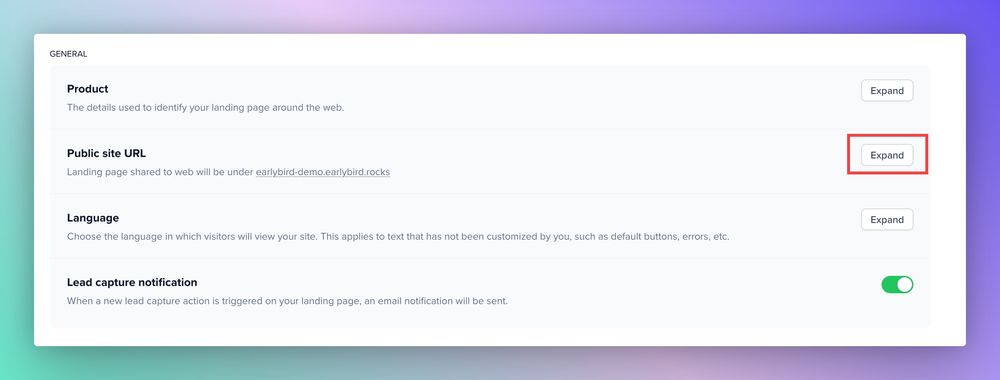
Then go to the Public site URL tab and click on Expand to reveal the Custom URL field.
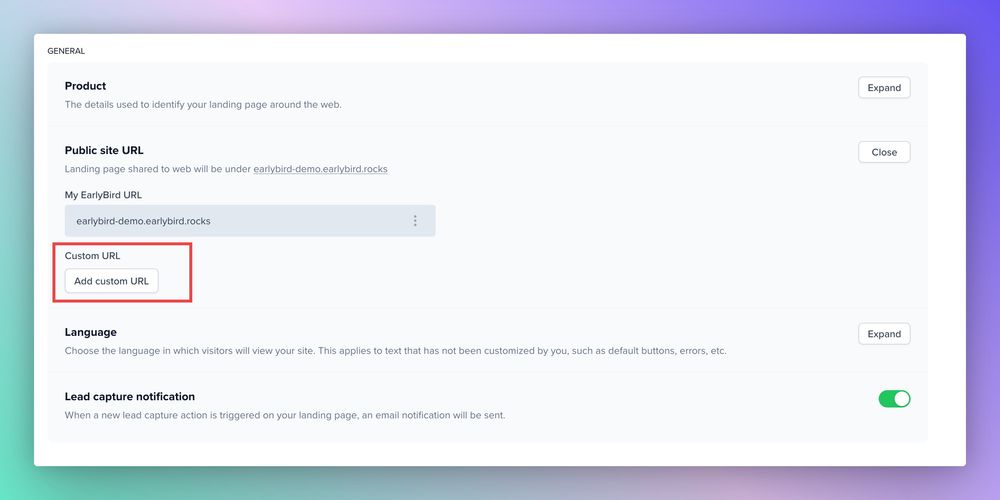
Step 3: Add a Custom Domain
Note
Please note that you need to be on the Starter tier and above to be able to add a custom domain.
Click on Add Custom URL to reveal the input fields and instructions from EarlyBird.
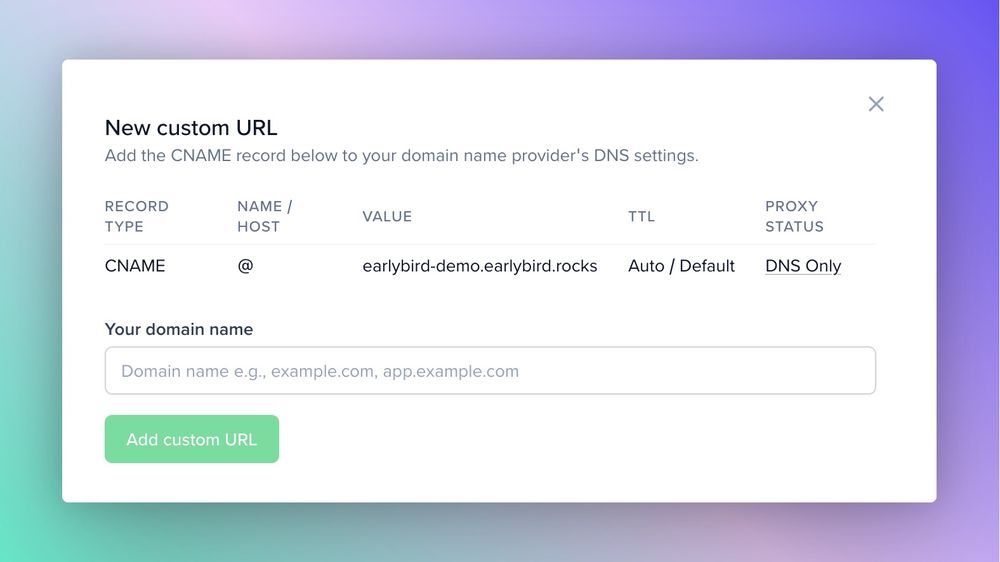
Step 4: Configuring the Domain
You'll see an instruction on how to add the domain. Refer to the instructions and add a CNAME record to the www subdomain or your root domain, depending on your preference.
First, make sure you have the CNAME record value provided by EarlyBird. This will typically be in the form of "yourdomain.com" pointing to "name.earlybird.rocks."
Next, depending on the registrar you purchased your domain or your DNS provider, follow their corresponding guide to add a CNAME.
Note
Double-check and eliminate any conflicting DNS records such as A, AAAA, CNAME, ALIAS, or ANAME that share the same name or host as what you are attempting to add.
Here’s an example case, where Cloudflare is the DNS manager
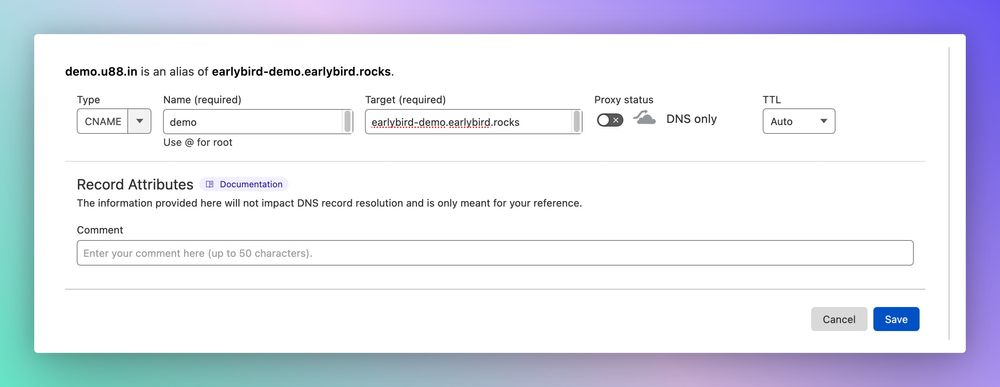
Assign Domain to EarlyBird
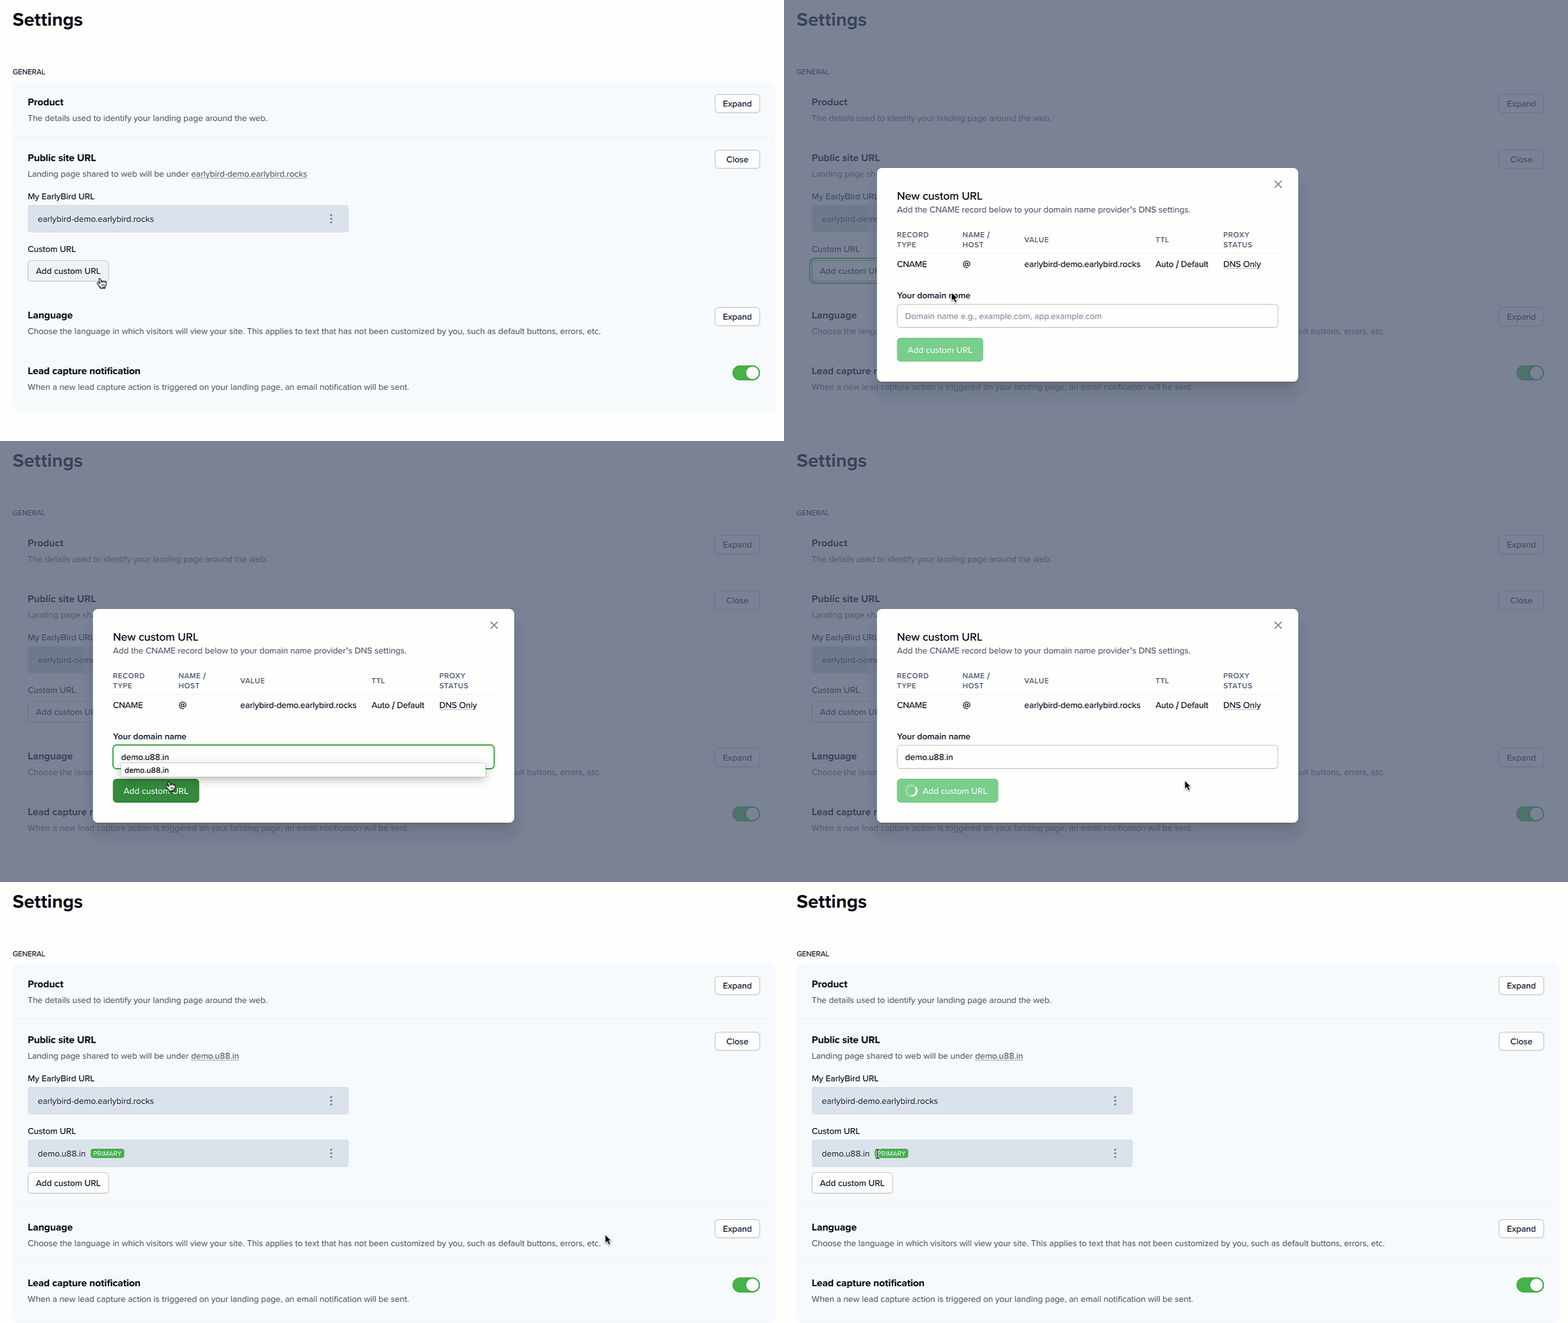
Once you finish pointing your domain to “name.earlybird.rocks,” paste it to the Custom URL field in Landing page settings and Click on Add custom URL
Step 5: Domain Configured
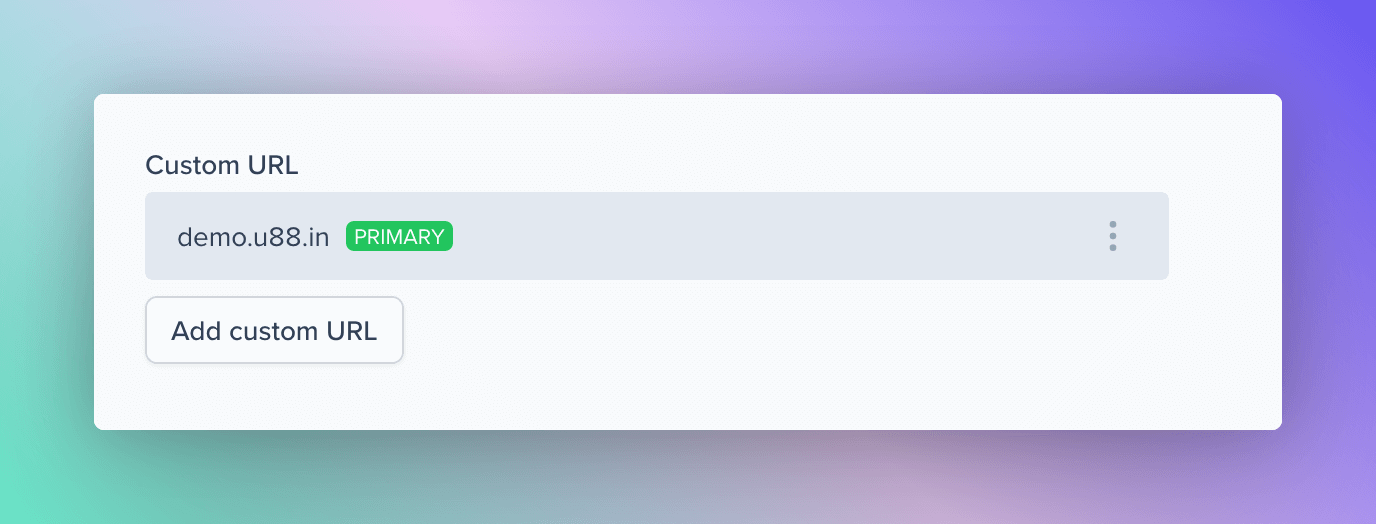
Once the domain is configured, you will see something like this: